Create first workflow
Create your first AI workflow!
Prerequisites
To create workflow, you must first have an organization set up in Buildel. If you haven't created one yet, please refer to our previous guide on how to do so.
Create a new workflow
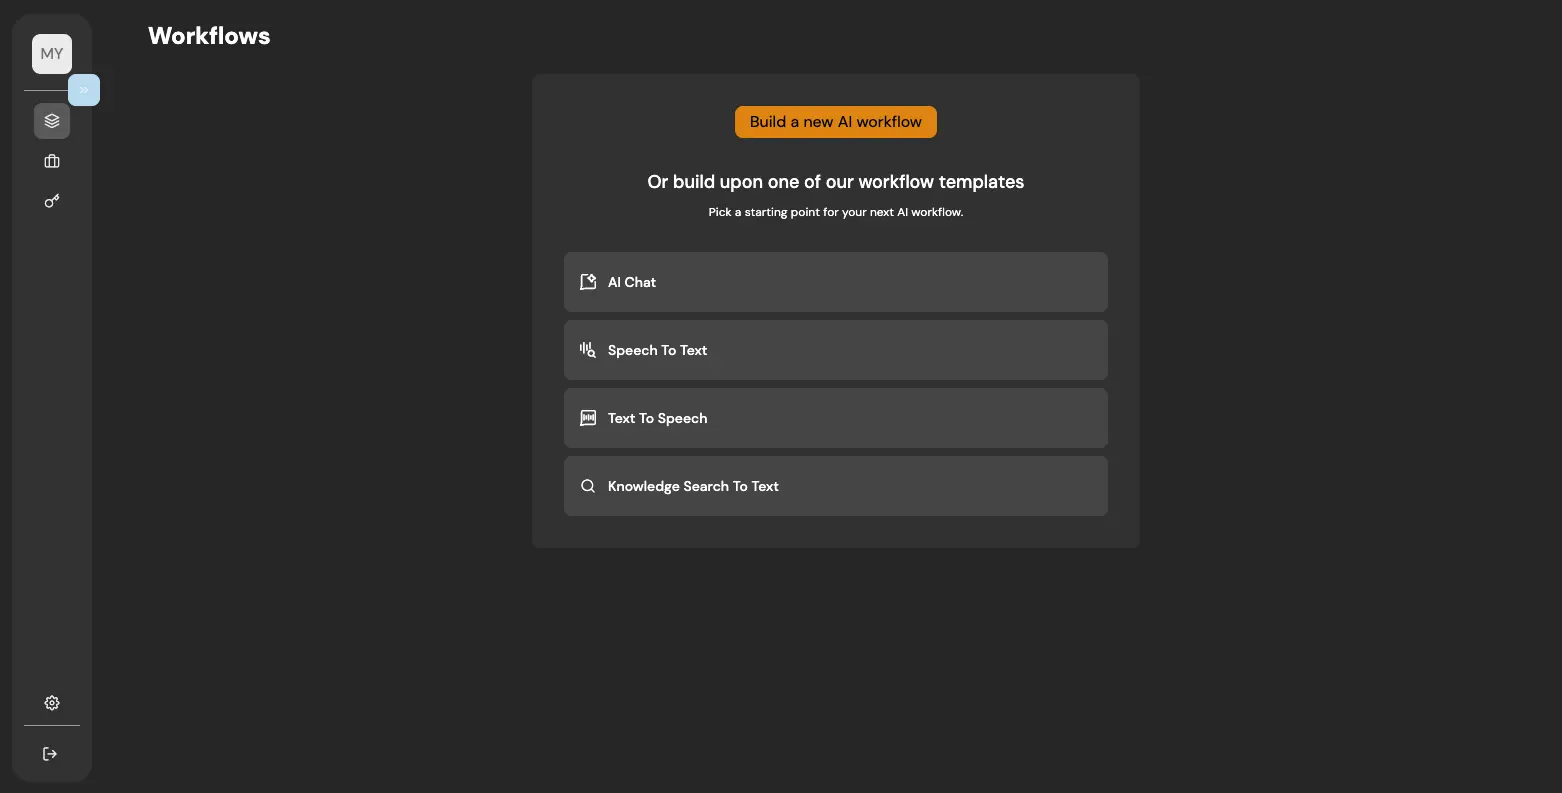
If you haven't set up any workflows yet, you'll be greeted with the screen shown below. As you can see, you have a couple of choices: you can start a workflow from scratch or select one of our predefined templates.

To create a workflow from scratch, simply click on Build a new AI workflow. A sidebar will appear on the right with a field for the workflow name. Enter "My First Workflow" and then click submit.
Once you've successfully submitted, you'll be redirected to the main page of your workflow. Here, you can manage your workflow by adjusting its settings and more.
Add our first blocks
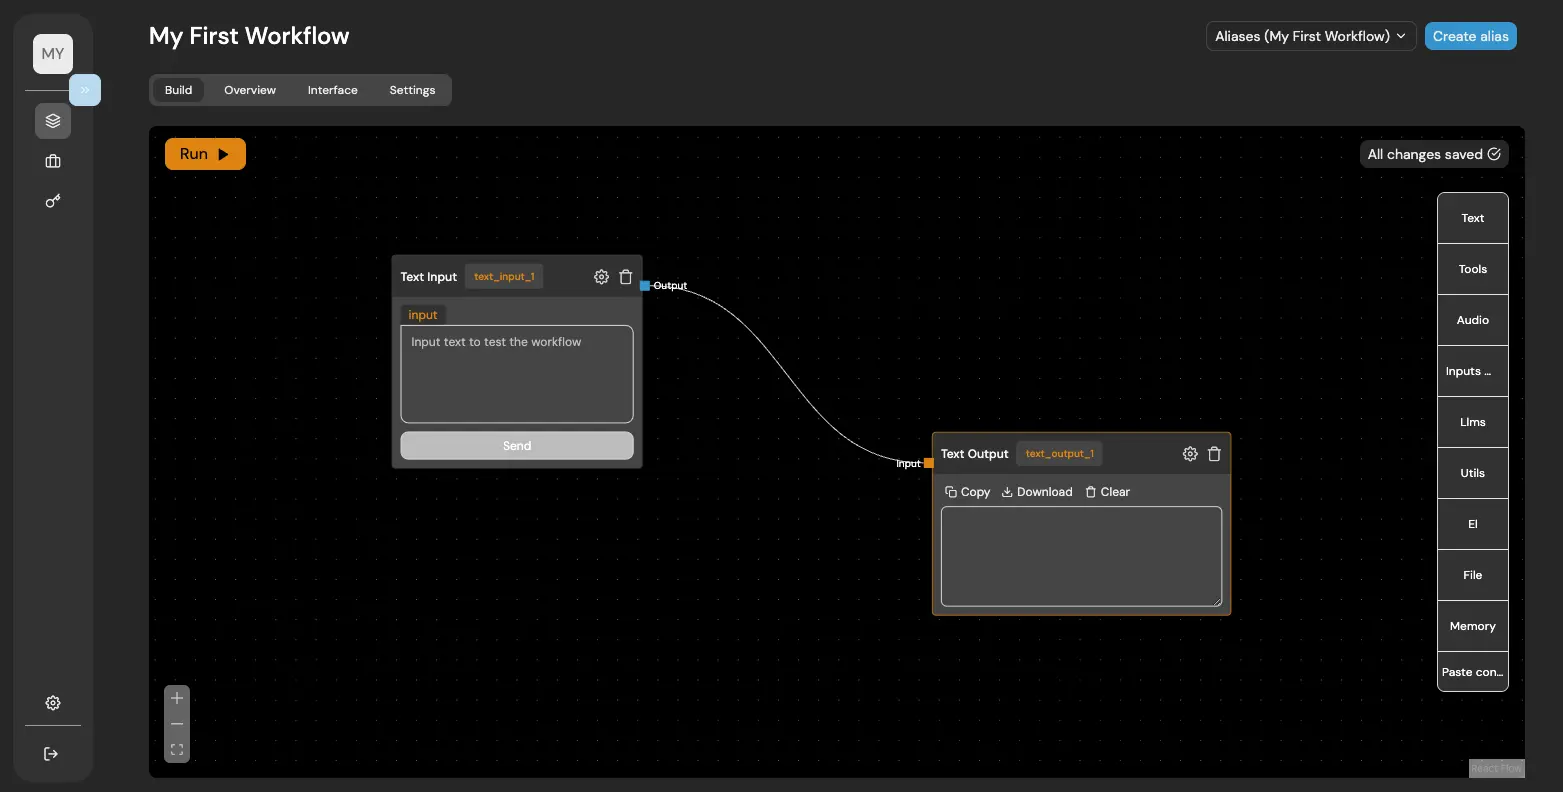
On the right side, there's a sidebar displaying block categories. Buildel offers a variety of block types for numerous interesting operations. Let's start with a basic workflow to see how straightforward it is. From the sidebar, select the text-input block and add it by clicking the plus icon or dragging it into your workflow board.
Repeat the process with the text-output block. Once added, we can connect the text-input and text-output blocks together to complete the setup.
In Buildel, blocks can have various input/output types. For now, you have to remember that you can connect blocks together only if their inputs/outputs shape is the same and the colors differ.

Now, you can initiate your workflow. Click the Run button, and if the label of the button changes to Stop, it means the workflow is properly configured and doesn't have any issues.
Additionally, you'll notice that the connection between blocks will start animating, indicating the flow of information from one block to another.
You can now input a value into the text-input block and click Send. The workflow will manage the connection between blocks and transmit the data to the text-output.
Cool, right? You might think it's neat to see the blocks in action, but nothing extraordinary happened here. And you'd be right...
Let's change that and add some AI magic to our first workflow...
Add LLM to our workflow!
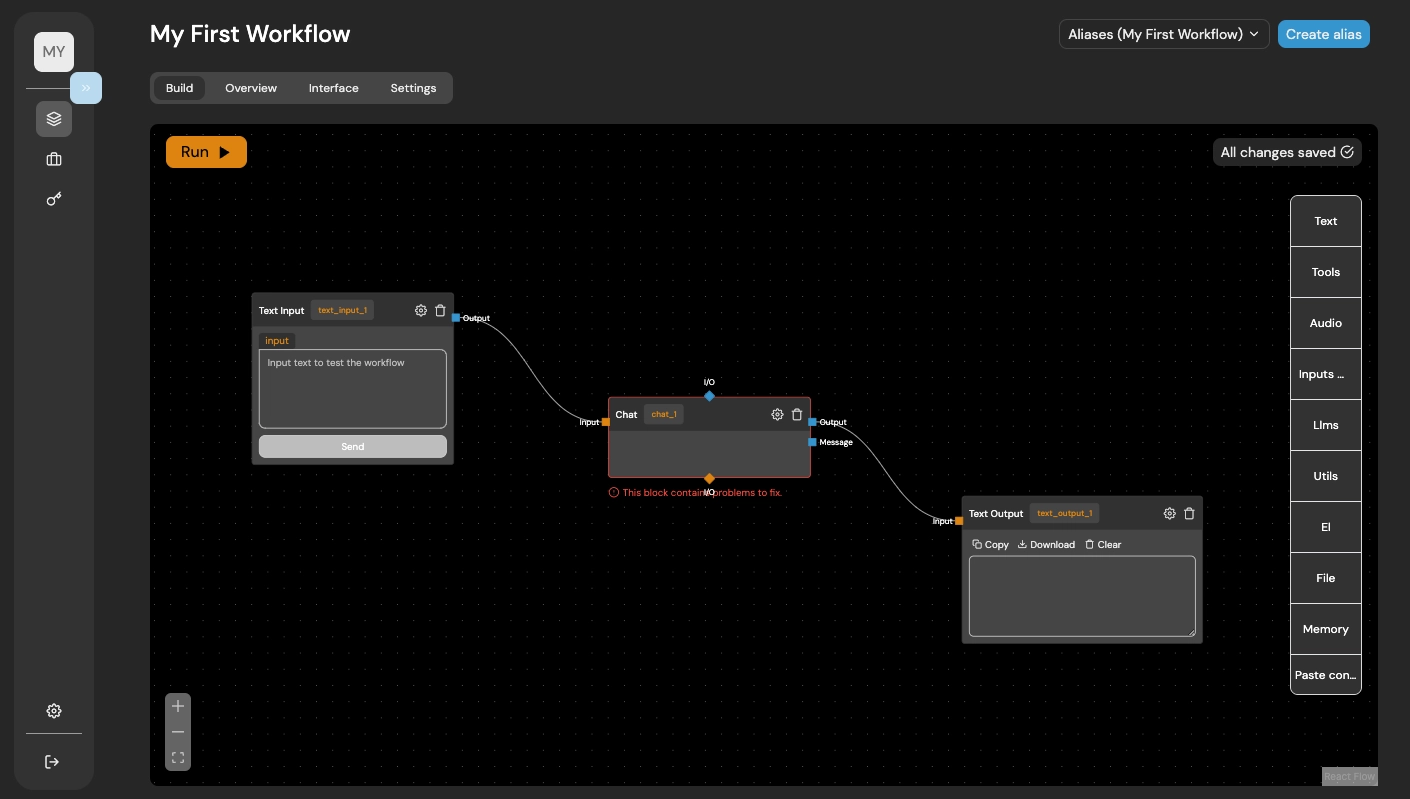
Find the chat block in the sidebar and add it between the two blocks you've already placed. You might notice the chat block has more input/output types, but we'll delve into that later.

If you try to run the workflow immediately, you'll encounter an error message in the top-right corner indicating that the workflow has errors and cannot be run. This is accurate. As you'll observe, the chat block has several errors that need to be resolved before we can proceed...
To do so, click on the gear icon on the chat block. This action will open the sidebar with the block's configuration options.
There is a lot of options that might seem overwhelming at first. For now, let's concentrate only on the essential settings that are crucial for getting the workflow working.
The first step we took was to add the API Key. Since we're using the OpenAI model, specifically GPT-3.5 Turbo Preview, we needed to add our OpenAI API Key to Buildel and select it in this configuration.
In Buildel, you can easily switch between LLM models from different providers. The only requirement is to provide the API Key obtained from the chosen provider.
Next, we filled out the System Message, which you can consider for now as instructions for the Chat. It tells the Chat how to react or interpret user prompts.
Lastly, we have the Prompt Template. In this section, you can either type your questions directly to the chat or, like we demonstrated in the video, choose from the text inputs connected to the chat. The editor will suggest available inputs as you start typing.
Take note that the format for providing input to the chat prompt template is simply the name of the block followed by the name of the output, like this: name_of_the_block:name_of_the_output.
Try to remove the connection between text-input and chat block. The color in the prompt-template editor will change to red if the chat block does not have that input connected.
Try it out!
Now, let's go ahead and run our workflow.
Cool, right? With just a few clicks, you've created your first fully working AI assistant that can now be used in your applications. I encourage you to play around with the configuration and see how the chat functions.